Log Title: Image Persistence: The Lifecycle of Committing, Migrating, and Deploying Custom Docker Images
Transitioning from manual container modifications to persistent, portable infrastructure. Explore the architectural workflow of committing container states, exporting them as immutable archives, and migrating custom images across distributed environments.
In the standard DevOps workflow, images are built from Dockerfiles. However, there are scenarios—such as rapid prototyping or troubleshooting—where manual modifications are made inside a running container. To preserve these changes and migrate them across distributed environments without a central registry, we must utilize the Commit and Migrate lifecycle.
This guide explores the architectural process of snapshotting a container's read/write layer, serializing it into a portable archive, and re-initializing it on a remote compute node.
Phase 1: Capturing the Volatile State (docker commit)
When a container is running, any changes you make (e.g., editing index.html or modifying a config) exist only in the temporary container layer. If the container is deleted, the changes are lost.
1. Modifying the Environment
2. Snapshotting the Layer
To turn these manual changes into a permanent asset, we use the commit command. This creates a new Image Layer on top of the base image.
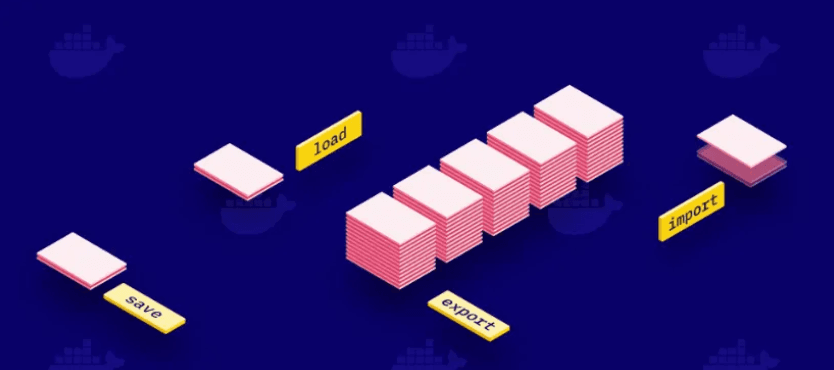
Phase 2: Serializing for Migration (docker save)
Standard image distribution relies on docker push/pull to a registry. However, for air-gapped systems or direct node-to-node transfers, we can Serialize the image into a tarball archive.
The resulting .tar file contains all layers, metadata, and history required to reconstruct the image on any Docker host.
Phase 3: Distributed Transfer (scp)
With the image now existing as a flat file, we can utilize the Secure Copy Protocol (SCP) to migrate the asset across our network fabric to a remote target node (e.g., a secondary EC2 instance).
Phase 4: Deserialization & Global Execution (docker load)
On the target machine, we must inform the local Docker daemon of this new image. The load command reads the tarball and reconstructs the image layers in the local storage engine.
- Hydrating the Image bash docker load -i /home/user/images/my_nginx_modified.tar
- Launching the Modified Node Now that the image is registered, we can launch the container. It will retain every modification we made on the original source machine.
Conclusion: Registry vs. Archive
While a Docker Registry (like Docker Hub or ECR) is the preferred method for production CI/CD, mastering the Save/Load lifecycle is essential for:
- Air-Gapped Environments: Moving images to systems with no internet access.
- Rapid Snapshots: Creating quick backups before risky configuration changes.
- Direct Migration: Bypassing the network overhead of a registry for small, localized transfers.
Understanding how to manipulate the container layer directly provides the flexibility required to manage infrastructure in non-standard enterprise environments.
Happy Shipping! 🚀
Fuel the Architecture
If this deep dive helped you build something better, consider fueling my next late-night coding session.
Newsletter Updates
Join 1,000+ engineers receiving weekly insights into AI, cloud architecture, and technical guides.